Can we just take a minute and yell... "YIPEE!! FRIDAY IS FINALLY HERE!!" Don't some weeks just seem longer than others?!! This is one of those weeks for me!! But the good news is.... there is a new challenge at Frosted Designs! This week it is a color challenge... brown, aqua, and lime green!! So... get out your scrappy goodies, make something fab, and link it up over at Frosted Designs!! We love to see everyone's creations!! And, check out what my design sisters created for you... you won't be disappointed!!!
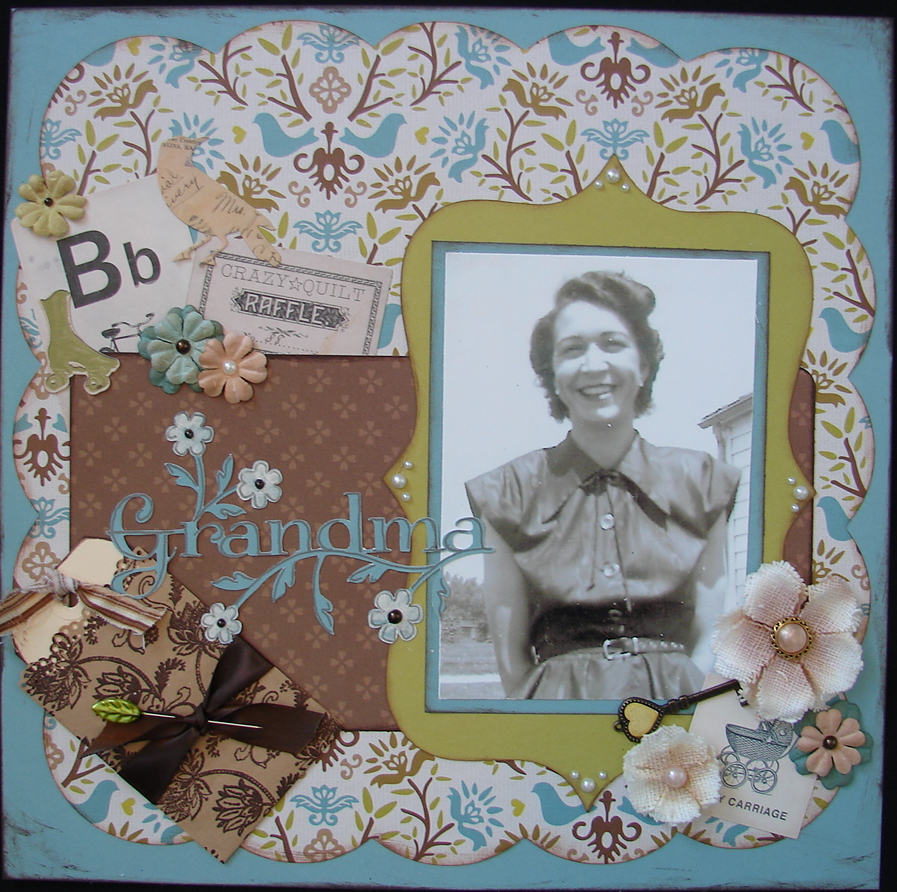
This is a picture of my grandmother... isn't she just precious?!! I love this photo of her! I found the papers (Colorbok - Woodhaven) and knew they would work great for the LO I had in mind!! Most of the embellishments are from K&Co. The flowers are Prima, some of which I chalked a bit with light brown and added a pearl center. Pearls are from Recollections. Key is Making Memories. Cricut carts used are Mini Monograms, Mother's Day & Storybook!! I stamped the cute little pocket/envelope with an Autumn Leaves Stampology. I wrapped a ribbon around it and added a pin that I had from my Paper Poppy March kit! The title "Grandma" was cut using the Mother's Day cart. I painted the flowers with Smooch Pearl paint and added some details with my Souffle pens. On the tag I tucked in, I wrote down some information about my grandmother that I want my children to know someday; things like her full name, married names (she was married twice), birthday, where she lived, school she attended... you know - stuff you never think to ask but wish you knew!!
Thanks for stopping by and taking a closer look at my LO... It means so much to me that with so many blogs out there, you would take the time to stop and visit mine for a bit!! I have the bestest bloggy friends out there!!
Barb :)
Showing posts with label mother's day. Show all posts
Friday, April 30, 2010
Thursday, February 4, 2010
Yes!...to a lifetime together!
My daughter walked into my office today and asked, "Mom, cute LO but why does it say yes?!" Well, the answer is simple. This picture was taken the night my husband proposed to me. We were so much younger then! (Notice the face with no wrinkles!!) LOL! But it was also one of the best nights of my life! He is my best friend and is so very good to me! He spoils me like crazy and I am so blessed to have him as my husband! The perfect picture/memory for a Valentine's LO....

The challenge at Frosted Designs this week was to make a Valentine's LO without using any red or pink. So, I chose to use blues and browns! I also tried some new techniques! If you haven't already, head on over to Frosted Designs to see all the amazing ideas the design team has come up with! And then try some of your own and be sure to share them with us! I love checking out all the creativity and inspiration from the projects submitted each week!
Like I said, I tried a new technique. I recently purchased a set of Glimmer Screens (Garden Lattice) from Tattered Angels and couldn't wait to give it a try! I used a blue sheet of cardstock from the DCWV Christmas Stack. I laid the screen on the bottom left corner and sprayed the paper with Coffee Shop Glimmer Mist. I pretty much covered the entire screen. I gave it a few minutes to dry (it's amazing how quickly it dries!) and then I moved the screen just slightly. (I wanted the print to be a little messy!) Next I sprayed on Sapphire Glimmer Mist, this time leaving it mostly in the bottom left corner. Finally I gave it a coat of Marshmallow Glimmer Mist concentrating mostly on the upper right side of the paper. The pictures don't really show it but it really has a beautiful shimmer to it! I removed the screen and let everything dry. After everything dried, I took my black Souffle pen and started outline the shapes from the stencil. The cool part was the way the pen changed from black to a brown that blended right in! I used an exacto knife to cut along the top of the heart so that I could put the corner of my picture behind it. The picture is layered on top of an old page from a book and some Basic Grey Periphery paper. The dark blue layer was embossed with my cuttlebug and then I sanded it to let the white core show through.
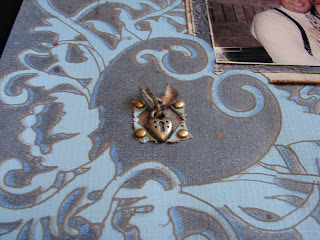
I used the end of my scissors to dig at the center of the heart until I got the paper to tear so that I could insert the heart charm (Making Memories). The rest of the embellishments were some I had around in my stash. The chipboard letters are from colorbok. The flourish at the top of the page is from the Mother's Day Cartridge. I used some Cats Eye chalks in various shades of brown to distress some of the papers.
Thanks for stopping by and looking at my LO! If you have time, I would love to hear any comments you have! Barb
The challenge at Frosted Designs this week was to make a Valentine's LO without using any red or pink. So, I chose to use blues and browns! I also tried some new techniques! If you haven't already, head on over to Frosted Designs to see all the amazing ideas the design team has come up with! And then try some of your own and be sure to share them with us! I love checking out all the creativity and inspiration from the projects submitted each week!
Like I said, I tried a new technique. I recently purchased a set of Glimmer Screens (Garden Lattice) from Tattered Angels and couldn't wait to give it a try! I used a blue sheet of cardstock from the DCWV Christmas Stack. I laid the screen on the bottom left corner and sprayed the paper with Coffee Shop Glimmer Mist. I pretty much covered the entire screen. I gave it a few minutes to dry (it's amazing how quickly it dries!) and then I moved the screen just slightly. (I wanted the print to be a little messy!) Next I sprayed on Sapphire Glimmer Mist, this time leaving it mostly in the bottom left corner. Finally I gave it a coat of Marshmallow Glimmer Mist concentrating mostly on the upper right side of the paper. The pictures don't really show it but it really has a beautiful shimmer to it! I removed the screen and let everything dry. After everything dried, I took my black Souffle pen and started outline the shapes from the stencil. The cool part was the way the pen changed from black to a brown that blended right in! I used an exacto knife to cut along the top of the heart so that I could put the corner of my picture behind it. The picture is layered on top of an old page from a book and some Basic Grey Periphery paper. The dark blue layer was embossed with my cuttlebug and then I sanded it to let the white core show through.
I used the end of my scissors to dig at the center of the heart until I got the paper to tear so that I could insert the heart charm (Making Memories). The rest of the embellishments were some I had around in my stash. The chipboard letters are from colorbok. The flourish at the top of the page is from the Mother's Day Cartridge. I used some Cats Eye chalks in various shades of brown to distress some of the papers.
Thanks for stopping by and looking at my LO! If you have time, I would love to hear any comments you have! Barb
Subscribe to:
Posts (Atom)