I just love a good sale, especially when it comes to scrapbooking items! And I just could not help myself this week when I was in Michaels and they had all their Halloween things on clearance!! And they had some Martha Stewart border punches (that I have had my eye on for some time) on clearance!! Well... I didn't have a choice but to load up my cart!! heehee!! It was like they were paying ME to take this stuff out of the store!!! At least that is how I will explain it to my hubby!!
So, this is the LO I made with all my new goodies!! These are pictures from last year. Every year (until now) my sister and I would take our kids to the local zoo for some Halloween trick-or-treating fun!! I have SO many pictures over the years!! Don't you just adore all the sweet little Halloween creatures I added to this page!?! All of these are from K & Company!
And for this LO I used our newest sketch from Sketches In Thyme!! The sketch is one from Scrapbooks Etc. I really liked this sketch and I am sure I will be using it again!! As you can see, I had to change the amount of photos I used to accomodate the photos I liked best. But other than that, I pretty much stuck to the sketch this time!!
I love the photo of Lauren hiding behind Army man Brayden!! I guess every movie star needs a body guard!!
So... that is all I have for you!! Be sure to stop by the Sketches in Thyme blog to see what the other lovely Mavens made for you! You can also get details about the design team call going on over at Sketches in Thyme!! And, be sure to check back tomorrow!! I have some goodies I made with the left overs from these adorable papers!! And Frosted Designs has a new challenge!! Thanks for stopping in today!!
Barb :)
Thursday, October 28, 2010
Wednesday, October 27, 2010
Create!
Okay,.. I know I am not visiting all of you as much as I should, but I have a really, really good reason!! I got completely and totally wrapped up in this project I have been working on!! It has been a project in the making the entire month!!! Are you ready for it?!!! Well here it is!!
The Cricut Circle Blog has a monthly challenge and this month the challenge was to make something (LO, card, project) that "Celebrates Creativity!" Well, I started thinking about what I was going to do and then one day, while cleaning out the remaining boxes in my garage, I came across an old frame that I was going to throw away. Then the idea hit me!! I wanted to make something for my new office!! And so... I went to work on it!! The requirements are that I had to use the Cricut with at least 2 cuts and use the shadow feature, I had to use patterned paper and use an embellishment!! Check, check, and check!!
I thought it would be cool to make the word "Create" really big and then include the definition!! Clever huh?!! The word was cut out using the Storybook cart. I distressed the cardboard I was using for the background and popdotted all the letters. I added some pearls to jazz them up a bit!!
As for the definition, I did a lot of distressing, inking and stamping... even though you can't tell in the photos!!
The rest of it was soooooo much fun to make!! I turned each of the little squares into my own little scrapbook canvases to work with!! I wanted to use a variety of colors while still making it something that would look good in the house. I had to control myself from adding too much bling... my favorite thing to add to LOs!!!! lol!! I just didn't think it would look too good in my office if it was glowing from all the bling!!
What?! You would like to see closeups?!! Of course!! Here you go....
The bird in the cage was cut using the French Manor cart. I pop dotted the layers to make it look more dimensional... then of course, added some stickles!! I heat embossed the background and added the paper/ribbon stripe across the middle!!
Is my bird not the cutest?!! I cut him from the Home Decor cart and pop dotted the layers again. But this time, I added some crackle glaze to the top layer to give it a cool, distressed kind of look!! I found that lovely branch right in my landscaping!! How lucky is that?!! My husband was thrilled!! I hand cut some cute little leaves and added a few charms!!
AND.... one of my other design teams, Sketches in Thyme is also doing a design team call!! Click HERE to check it out!!
The Cricut Circle Blog has a monthly challenge and this month the challenge was to make something (LO, card, project) that "Celebrates Creativity!" Well, I started thinking about what I was going to do and then one day, while cleaning out the remaining boxes in my garage, I came across an old frame that I was going to throw away. Then the idea hit me!! I wanted to make something for my new office!! And so... I went to work on it!! The requirements are that I had to use the Cricut with at least 2 cuts and use the shadow feature, I had to use patterned paper and use an embellishment!! Check, check, and check!!
I thought it would be cool to make the word "Create" really big and then include the definition!! Clever huh?!! The word was cut out using the Storybook cart. I distressed the cardboard I was using for the background and popdotted all the letters. I added some pearls to jazz them up a bit!!
As for the definition, I did a lot of distressing, inking and stamping... even though you can't tell in the photos!!
The rest of it was soooooo much fun to make!! I turned each of the little squares into my own little scrapbook canvases to work with!! I wanted to use a variety of colors while still making it something that would look good in the house. I had to control myself from adding too much bling... my favorite thing to add to LOs!!!! lol!! I just didn't think it would look too good in my office if it was glowing from all the bling!!
What?! You would like to see closeups?!! Of course!! Here you go....
The bird in the cage was cut using the French Manor cart. I pop dotted the layers to make it look more dimensional... then of course, added some stickles!! I heat embossed the background and added the paper/ribbon stripe across the middle!!
Is my bird not the cutest?!! I cut him from the Home Decor cart and pop dotted the layers again. But this time, I added some crackle glaze to the top layer to give it a cool, distressed kind of look!! I found that lovely branch right in my landscaping!! How lucky is that?!! My husband was thrilled!! I hand cut some cute little leaves and added a few charms!!
My favorite part is the way I included quotes that had to do with creativity!! Talk about clever!! They say...
* All children are artists. The problem is how to remain an artist once he grows up. - Pablo Picasso
* Human salvation lies in the hands of the creatively maladjusted. - Martin Luther King Jr.
* The world is but a canvas to the imagination. - Henry David Thoreau
Aren't those the best?!! I also loved this square! The film strip is Tim Holtz that I had left over from one of my Lucky Girl Kits and the tickets came from the kit too. I just inked them with distress ink and then sprayed them with water!! Love how it gives it that instant worn look!!
Sorry this was so picture heavy... there was just so much to it, I wanted you to be able to see all the details!!
But before I leave, I have a few things to share with you!! My good friend and design buddy, Pat, has started this really cool new blog, Scrapping The Moments, that has a forum and will be a great resource of information!! I am so excited for her!! She is currently looking for some designers for this new blog. Please stop by and check it out!! I'm sure she would like some blog love!!! You can get there by clicking HERE!!
I will be back tomorrow with a new design for Sketches in Thyme and a much shorter post!! Have a great day!!
Barb :)
Labels:
Circle Blog,
French Manor,
home decor,
storybook
Friday, October 22, 2010
Cherish
It's Friday and that means that we have another challenge at Frosted Designs!! This week Debbie is challenging us to use die cuts! How easy is that?! We all use them whether they are hand made with our Cricut, Sizzix or any other machine or they are store bought!! I used a combination of both!!
As many of you know... I am living very far from my family for the very first time. I absolutely love living in Texas... especially liking the 80 degree days!! However, when I ran across this picture of me with my 2 sisters and brother, I knew I wanted to scrap it!! I found the Cherish Sticker in my stash and I thought it worked perfectly!
To stick with our theme of die cuts, I used a die cut paper for the background. I cut out the frame around the photo using my Cricut (Accent Essentials) and I finished off the layout with die cut flowers and leaves from K & Company.
Now... go over to Frosted Designs to see what my fabulous dt sisters created for you!! Be sure to link up your project for a chance to win this prize:
Thanks for stopping by and thank you for your kind comments! Have a great weekend!!
Barb :)
Thursday, October 14, 2010
Leaves are Falling!
**THIS IS MY SECOND POST TODAY AND IS A DUPICATE OF WHAT I POSTED ON SHE'S A SASSY LADY BLOG TODAY!! PLEASE SCROLL DOWN TO SEE THE SKETCHES IN THYME CHALLENGE!!**
Good morning! I'm Barb and I am back again and happy to be guest designing on Sassy's blog!! With the change of seasons, I thought it would be fun to use up some supplies that have been laying around and play with some new techniques!! Here is a sneak peek at what we are going to be making today....
Do you see the leaves with all the fall colors?! I'm going to show you how I made them! I started with some cheap photo paper I had laying around my office. I never liked how the photos looked when I printed them on this paper, yet I didn't feel like I could throw it out.... so why not use it?!
I pulled out some of my alcohol inks that I hardly ever use.. but that might change after doing this project because it was so much fun!! lol!! For my project I used butterscotch, cranberry, lettuce and a little alcohol blending solution.
I started with my lightest color and worked my way to the darkest. I put a few drops of "butterscotch" on the pad of my Tim Holtz tool and started rubbing it across the paper. There is no right or wrong way to do this and you don't want it to look perfect. (On my first attempt I put the ink directly onto the photo paper but once I started rubbing it in, I was still left with little dots where I had originally put it on. I decided that putting it on the applicator pad was a much better way of doing it!!)
Next I added green (lettuce) to the same applicator and spread it over the yellow. After that I added in the cranberry. Note to self.... when using darker colors, you can use less ink!! A little goes a long way!! (In this photo you can see the cardboard box I used to protect my table top... be sure to put something under your paper when working with these inks!!!)
I wasn't happy with how the red looked on the paper... a little too bold and not blended enough. To solve this problem, I added a little Alcohol Blending Solution directly to the pad I had used for the other 3 colors and rubbed it over the top. It really did blend the inks together nicely!!
I made a second sheet using less reds and more greens... this way I would have some variety when I was ready to start cutting!
I cut the paper into smaller pieces and loaded it onto a cricut mat along with the brown that I was using for the background layer of the leaves.
I used my Gypsy to plan out where I was going to place everything. If you don't have a gypsy, design studio works just as well!!
Once the leaves were cut, I wanted to get rid of the white lines that were on the outside of the leaves from the paper. This was an easy problem to fix... ink!! I inked the edges of the leaves as well as the centers and I inked the brown background paper. In this photo you can see the difference between the one that was inked and the one that wasn't!
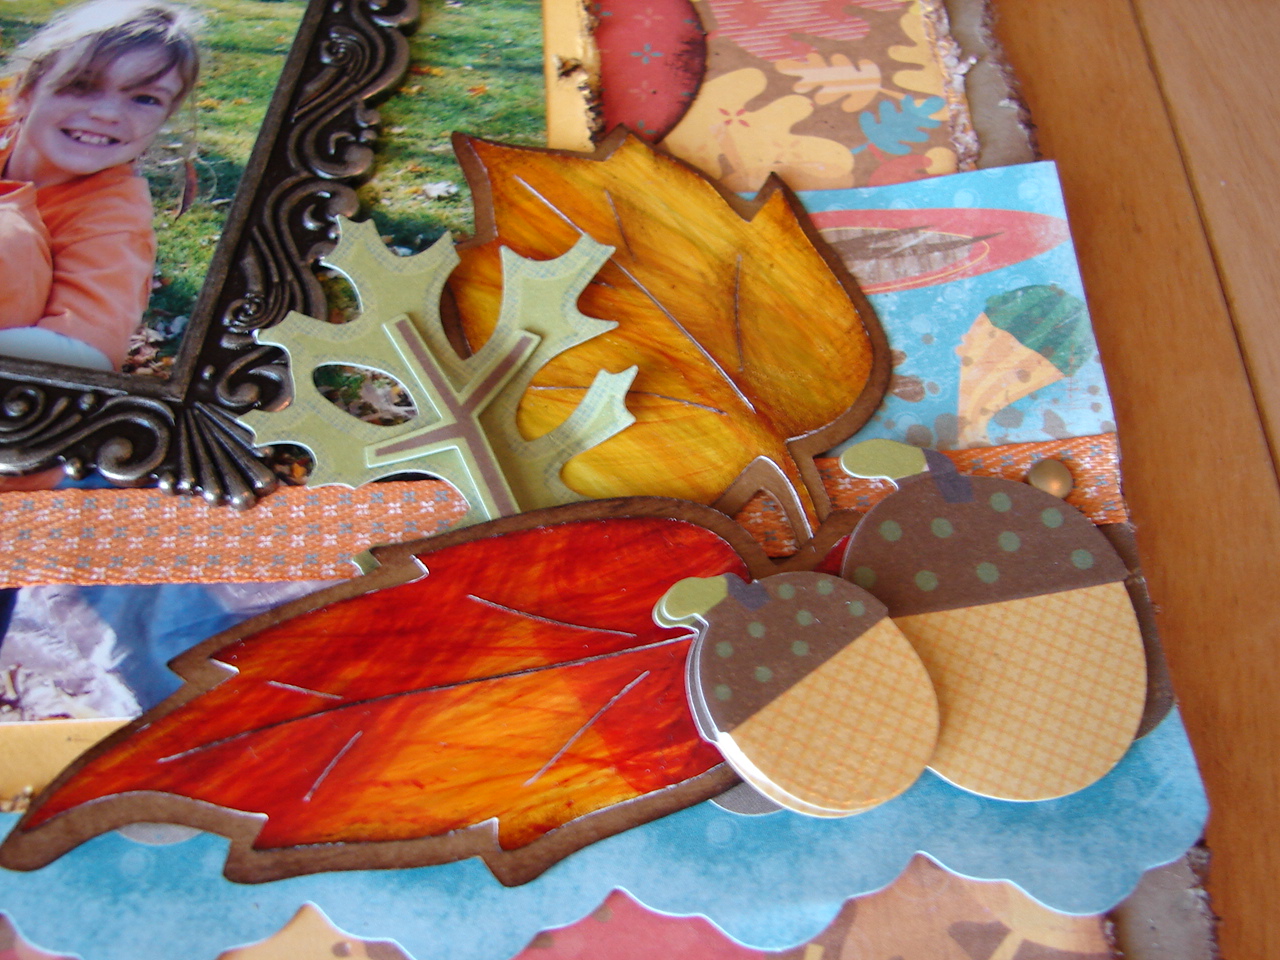
The last step was to glue the leaves onto their background layer and then use them in a layout! This is a layout I did of my daughter and her friend while raking leaves for a neighbor. I added in a few other premade embellishments and my layout was complete!
Thank you for taking the time to visit She's a Sassy Lady AND for reading this very long post!! Have a wonderful weekend!!
Barb :)
I believe in Magic!
Happy Thursday everyone!! I hope you are all having a wonderful week! I am pretty excited because in a few short hours, my baby sister will be here for a visit!! Whoo Hooo!! We are going to get our annual fall shopping trip in after all!!
Sketches in Thyme has a new sketch for you this week and I decided to do my layout using some of my new pictures from our Disney Trip!! These are pictures of Matt and Lauren getting along!! Yes.. I said it!! They actually got along the entire week!! Which inspired the title... I believe in Magic! If you can read my journaling on the side, it says "Disney must be magic because Matt and lauren got along the entire week!!!" I wish everyday could be a Disney day!! lol!!
And here is the sketch we started with!! We would love to see what you can do with it!! Be sure to upload your project at Sketches in Thyme for a chance to win the monthly prize!
This project also qualifies for the challenge at the Cricut Circle Blog. This week they are asking for pink, ruffles, scallops, flourishes, glitter and jewels!! This LO has all of those things!! I used the following carts: Stone Script, Storybook, Bloom, and Lovely Floral!!
Be sure to stop by Sketches in Thyme to see what the other Mavens did with this sketch!! Thanks for stopping by! I always love to read the comments you leave for me!!
Barb :)
Sketches in Thyme has a new sketch for you this week and I decided to do my layout using some of my new pictures from our Disney Trip!! These are pictures of Matt and Lauren getting along!! Yes.. I said it!! They actually got along the entire week!! Which inspired the title... I believe in Magic! If you can read my journaling on the side, it says "Disney must be magic because Matt and lauren got along the entire week!!!" I wish everyday could be a Disney day!! lol!!
And here is the sketch we started with!! We would love to see what you can do with it!! Be sure to upload your project at Sketches in Thyme for a chance to win the monthly prize!
This project also qualifies for the challenge at the Cricut Circle Blog. This week they are asking for pink, ruffles, scallops, flourishes, glitter and jewels!! This LO has all of those things!! I used the following carts: Stone Script, Storybook, Bloom, and Lovely Floral!!
Be sure to stop by Sketches in Thyme to see what the other Mavens did with this sketch!! Thanks for stopping by! I always love to read the comments you leave for me!!
Barb :)
Labels:
bloom,
lovely floral,
Sketches in Thyme,
stone script,
storybook
Friday, October 8, 2010
Tweet!
I hope all of you have had a great week!! I know I have!! We finished up our Disney Park days with a fabulous day! It started with Lauren going to the Bibbidy Bobbidy Boutique for her princess makeover and then we were off to Magic Kingdom! There she met some more characters and got more autographs!! After that we had dinner in Cinderella's castle... a major hit with Lauren!! And, as if that wasn't busy enough, we did the Mickey's Not So Scary Halloween Party until midnight!! What a jam packed day! I wanted to share some photos with you but that will have to wait until I get back and on my own computer!!
So.... It's Friday and we all know what that means..... A new challenge at Frosted Designs!! Whoo Hoo!! And I picked this challenge this week so I KNOW you are going to love it!! Are you ready?!! The challenge this week is to USE YOUR OWN HANDWRITING OR DOODLE ON YOUR LAYOUT, CARD OR PROJECT!! Seriously... could I have made it any easier on you?! If you use pen ANYWHERE on your project, you can enter to win some yummy Stampin Up candy that Pat has offered!! Go to FROSTED DESIGNS to check out more about this weeks challenge, check out what our lovely team did to show you just how easy it is, and you can see the prize!!
Here is the LO I did:


So.... It's Friday and we all know what that means..... A new challenge at Frosted Designs!! Whoo Hoo!! And I picked this challenge this week so I KNOW you are going to love it!! Are you ready?!! The challenge this week is to USE YOUR OWN HANDWRITING OR DOODLE ON YOUR LAYOUT, CARD OR PROJECT!! Seriously... could I have made it any easier on you?! If you use pen ANYWHERE on your project, you can enter to win some yummy Stampin Up candy that Pat has offered!! Go to FROSTED DESIGNS to check out more about this weeks challenge, check out what our lovely team did to show you just how easy it is, and you can see the prize!!
Here is the LO I did:

I love this picture of my daughter and my nephew! They are only 3 months apart and my sister and I were always doing pictures of them together!! Right now they still think this photo is cute... but something tells me that when it shows up on that graduation slide show they might think differently!! lol!!
So... for this challenge, I did all kinds of doodling! The frame around the photo is outlined in black pen and then I added the XOXOs!! I thought it turned out darling!! And since I am not much of an artist, I really didn't want to freehand my doodles... so I cheated!! hee hee!!! I took a black pen and outlined different parts of the flowers to make them stand out! I think it made it a little more fun! I also pop dotted the centers of the flowers to add a little more dimension to the project!

I also outlined the word "Tweet" because I wanted it to be my title and stand out just a little more!! Finally I added some speech bubbles with what I think these darling kids would be saying to my sister and I if they could!!
I hope you decide to join us for this easy peasy challenge! And be sure to check out Frosted Designs for more infomation about how you can win a prize just for being a follower!! But hurry, you only have until tomorrow!! We are also having a design team call at Frosted Designs... go check it out!! Have a great weekend! I should be back early next week to check in on all of you!! Thanks for stopping by!!
Thursday, September 30, 2010
Gone apple pickin'!!
Every year (until I moved this year) my sister and I would take our kids to a local apple orchard to take pictures ummm I mean pick apples!! Actually, we were pretty bad!! We were like papparazzi in the orchard!! There were certain pictures we always wanted to make sure we got and this is one of them...
This LO was made for Sketches in Thyme this week. The sketch is another one by Helen Croft... don't you just love her sketches?! They are so easy to work with!! Here is another view of my journaling (I really am trying to do more of this, but it is hard since I hate my handwriting!!)
We would love to see what you do with this sketch! Be sure to link up your layout at Sketches in Thyme for a chance to win this months prize! Most of the papers and embellishments on this LO came from my Lucky Girl September kit! It arrived right as I was moving into my new house and this was the first chance I had to open it up!! So much scrappy goodness inside!! This LO also qualifies for the Sisterhood challenge which is asking for 3 or more flowers so I will enter it there as well!!
We love the picture of the kids walking hand in hand down the row of trees! Isn't this so sweet?! I guess it is a good thing we got these pictures while we had the chance!!
This LO was made for Sketches in Thyme this week. The sketch is another one by Helen Croft... don't you just love her sketches?! They are so easy to work with!! Here is another view of my journaling (I really am trying to do more of this, but it is hard since I hate my handwriting!!)
We would love to see what you do with this sketch! Be sure to link up your layout at Sketches in Thyme for a chance to win this months prize! Most of the papers and embellishments on this LO came from my Lucky Girl September kit! It arrived right as I was moving into my new house and this was the first chance I had to open it up!! So much scrappy goodness inside!! This LO also qualifies for the Sisterhood challenge which is asking for 3 or more flowers so I will enter it there as well!! So...now if you will humor me.... I would like to brag about my daughter a bit!! I know you have heard me mention the club she started when she was six called "Kids Give Back"! Well, one day I opened a Disney email that said they were holding a contest to see who was the "Fairest Princess of Them All!!!" I decided to take a photo of Lauren in front of her 7 ft. castle my dad had built for her room and then wrote and essay that talked about the things she had already done for our community. Well... guess what?!! She won the prize!! The grand prize was hotel and airfare for 4 to Disney World with a day at the bibbidy bobiddy boutique (where she will get a full princess make over including a new gown and shoes!), breakfast with the princesses, 5 days of park hopper tickets, VIP seating at the fireworks or parade and so much more!! Click HERE if you would like to see her winning photo! If you click on the smaller photo in the bottom left corner, you will be able to read the winning essay!! Needless to say, she can't wait to go!! We leave Saturday morning and will be gone a week! So... when I can't stop by and visit all of your blogs, I am sure you will understand!!
Remember that Frosted Designs is having a Design Team call and we are also giving away some candy to some faithful followers!! Stop by and check it out!!
Thanks for stopping by today!! Barb :)
Monday, September 27, 2010
Frosted Designs is having a Design Team Call!!
Good Morning! I hope your Monday is off to a great start!! I just wanted to pop in and let you know that Frosted Designs is having a Design Team Call!! You can click HERE to find out more information about how you can become part of this amazing team of ladies!!
Thursday, September 23, 2010
We have a Color Challenge for you!!
Happy Friday everyone!! I can't believe it has been an entire week since I posted my last project!! This moving thing is really getting in the way of my scrapping!! But, pretty soon, I will have the house all unpacked and then I will have all kinds of time to create!!
At Frosted Designs this week, we are challenging you to use peach and cream on a layout/card/project! And if you want to get really crazy, you can throw in some ribbon or something sparkly!! I chose to scrap this LO of my oldest daughter with her grandparents (my mom and dad) from about 15 years ago!! My parents have been so good to Courtney over the years and they have a really special relationship!! I am so glad they still live close to her since I moved so far away!! I miss my baby girl!! (okay.. she's 20... not really a baby!!)
I used a Martha Stewart die cut paper for the background and then layered it with several different DCWV papers!! And then I just went to town layering all kinds of flowers on it!! I added gem brads to some, glued microbeads to others and inked a few more!! I painted a few chipboard embellishments with my perfect pearls, added some Prima flourishes and a butterfly and there you have it!!
So, now you need to head over to Frosted Designs to see what the rest of the design team did for you!! I always love how we can be given the same challenge and then come up with things that are so completely different!! Be sure to link up your project for a chance to win some digital stamps from Robyn's Fetish Digital Stamps and More!!
Thanks for stopping by!!
Barb :)
At Frosted Designs this week, we are challenging you to use peach and cream on a layout/card/project! And if you want to get really crazy, you can throw in some ribbon or something sparkly!! I chose to scrap this LO of my oldest daughter with her grandparents (my mom and dad) from about 15 years ago!! My parents have been so good to Courtney over the years and they have a really special relationship!! I am so glad they still live close to her since I moved so far away!! I miss my baby girl!! (okay.. she's 20... not really a baby!!)
I used a Martha Stewart die cut paper for the background and then layered it with several different DCWV papers!! And then I just went to town layering all kinds of flowers on it!! I added gem brads to some, glued microbeads to others and inked a few more!! I painted a few chipboard embellishments with my perfect pearls, added some Prima flourishes and a butterfly and there you have it!!
So, now you need to head over to Frosted Designs to see what the rest of the design team did for you!! I always love how we can be given the same challenge and then come up with things that are so completely different!! Be sure to link up your project for a chance to win some digital stamps from Robyn's Fetish Digital Stamps and More!!
Thanks for stopping by!!
Barb :)
Thursday, September 16, 2010
Frosted Designs Challenge
Well... it's Friday and that means that we have a new challenge posted at Frosted Designs!! This is Pat's week to host and she is challenging us to CUT UP A PHOTO!! Can you believe that?!! Actually, I am thrilled she picked this challenge because it pushed me to do a LO that I have been wanting to do for some time now!!
These are pictures I took of my family at Cedar Point Amusement Park a year ago!! I loved the photo of the ferris wheel and I loved that I got a picture of the first roller coaster Lauren ever rode and I wanted to put it all on a LO! But everything I tried seemed to get cluttered and the pictures were getting lost! Until I tried this technique!! I used a square paper punch to cut the squares in the photos and the patterned paper. That way I knew everything would be even!! I lined everything up into straight rows and added a few embellishments! I even added some chipboard squares under some of the photos (which isn't showing up well in this picture) to make some of the photos "pop!" My family loved the way it turned out!!
Now... we would love to see how brave you can be.... can you really cut up those fabulous photos?! Or a picture you worked so hard to color?!! You can do it... we know you can!! Show us what you've got!! And be sure to stop over at the Frosted Designs site to see what the design team did this week!! Their layouts and projects blew me away!! Link up your project for a chance to win some digis from Robyn's Fetish Digital Stamps and More!! Enjoy you weekend!!
Barb :)
These are pictures I took of my family at Cedar Point Amusement Park a year ago!! I loved the photo of the ferris wheel and I loved that I got a picture of the first roller coaster Lauren ever rode and I wanted to put it all on a LO! But everything I tried seemed to get cluttered and the pictures were getting lost! Until I tried this technique!! I used a square paper punch to cut the squares in the photos and the patterned paper. That way I knew everything would be even!! I lined everything up into straight rows and added a few embellishments! I even added some chipboard squares under some of the photos (which isn't showing up well in this picture) to make some of the photos "pop!" My family loved the way it turned out!!
Now... we would love to see how brave you can be.... can you really cut up those fabulous photos?! Or a picture you worked so hard to color?!! You can do it... we know you can!! Show us what you've got!! And be sure to stop over at the Frosted Designs site to see what the design team did this week!! Their layouts and projects blew me away!! Link up your project for a chance to win some digis from Robyn's Fetish Digital Stamps and More!! Enjoy you weekend!!
Barb :)
Wednesday, September 15, 2010
Finally... moved in and back to scrapbooking!!
It has been a long few weeks but I am finally in my new home and have all the boxes unpacked!! (We aren't counting the garage yet!! LOL!!) Now if we can get a few pictures hung on the walls, it might actually start to feel like home!!
And I am so thankful that I had my parents here to help me!! They came all the way from Indiana to help us get settled into our new home in Texas! My mom is an unpacking machine!! And my dad is Mr. Fix it!! By the time they left Monday night, we had the boxes unpacked, all the fix it up projects complete and still had time for a game of cards!!
And of course, I have a husband who does not let any grass grow under his feet... so the same day our furniture arrived, the pool company began digging in our backyard for our new swimming pool!! In fact, the pool people were already digging before our furniture showed up!! It was crazy!! But I am glad we started when we did... they are making great progress!! It has been less than 2 weeks and it already looks like this:
And I am so thankful that I had my parents here to help me!! They came all the way from Indiana to help us get settled into our new home in Texas! My mom is an unpacking machine!! And my dad is Mr. Fix it!! By the time they left Monday night, we had the boxes unpacked, all the fix it up projects complete and still had time for a game of cards!!
Thanks Mom and Dad!! You guys are the best!! Love you bunches!!
Now on to business!! This week we have a new sketch at Sketches in Thyme!! It is a sketch by Helen Croft at scrapalittlesketches.com!! These sketches are wonderful and so easy to work with! I used a picture of Greg and I with my parents in Cabo a few years ago. Instead of using two photos like the sketch, I decided to stick to just one! I love these papers from the Mi Casa stack from DCWV!! They are so perfect for my LOs from our Mexico trip!
Be sure to stop by the Sketches in Thyme blog and see what all the fabulous Mavens did with this sketch!! And then be sure to do your own LO and share it with us!!
And before I go, I really want to thank all of my fabulous friends who continued to stop by and leave comments and send emails throughout my move process!! It really means a lot to me that you took the time to check in from time to time... even when I wasn't always able to check in on your blogs!! I am so lucky to have met all of you through my blogging!!
Barb :)
Wednesday, September 8, 2010
Name Plaque
Good morning everyone!! I am slowly making progress on the boxes in my house... I pretty much have all the main living areas complete!! Now it is time to go shopping for some new furniture!! I love a good reason to shop!! Today is my day to be the guest designer on She's A Sassy Lady!! Since I have been busy with the move, I decided I would share a project with you that I did while I was staying with my parents before the move. My mom wanted to make a name placque for one of her friends so this is what we did!
We started by finding a 12x12 tile that was pretty neutral. Then I got out my Gypsy and designed the placque the way my mother wanted! (She's my mother... I have to do what she says!!)

Once we had decided on the sizes, I moved the pieces around on the mat so that they were grouped together to save paper. The last name and the corners were cut with the same cardstock. The large initial was cut with a patterned paper,
Once we laid the pieces on the tile to see how it looked, we decided that the "B" needed a little something to make it stand out on the tile. (We put newspaper behind the tile so it wouldn't scratch the table we were working on!)
So.... we decided to ink the edges of the "B"!
We laid it out again and liked the way it looked, so it was time to start glueing it down!
We started by brushing on some Mod Podge to the center of the tile using a foam brush. The key is to cover the surface without letting it get too thick and wet. If it gets too wet, the cardstock will start to buckle. Once the Mod Podge was on, we put the "B" on top.
While that was drying, we did the same thing with each of the corner pieces. We gave it a few minutes to dry, and then coated the entire tile with a new coat of Mod Podge.
We then followed the same procedure to add the entire last name over the initial.
Once the tile is dry, it is ready to display! It makes a great and inexpensive gift. I made several of these last year as gifts and had many requests to make more!
I hope you learned something new today! Thanks for stopping by!!
Barb :)
Friday, September 3, 2010
Life is Sweet
Hello everyone!! I am literally unpacking the boxes in my new home as you read this (thank goodness for being able to schedule posts!!) I was only able to get this one LO done this past week which wasn't easy considering all of my scrapbooking supplies are pretty much packed!! Thank goodness my mom was generous with her stuff!! And... I was able to use a digi from this months sponsor at Frosted Designs!! This month Robyn's Fetish Digital Stamps and More is offering the winner of the challenge a chance to win 5 digis of their choice!!! And they are giving this away each week for the month of September!! Now... you have to play along for that!!!
I used the Ms. Birdie digi on this LO!! Is it not the cutest?!! I colored her with my new Prisma pencils and then added some Stickles because I thought she needed a little bling!!
This weeks challenge at Frosted Designs is a photo inspiration challenge! Please head on over to Frosted Designs to see the photo and all the great things the design team did with this weeks challenge!! Please forgive me for not providing all the links this week.... I have a few things I have to get busy doing!! You can click HERE to get to Frosted Designs for all the information!!
This house is not going to unpack itself!! lol!! I had better get busy!! Thanks for stopping by to visit!! Hopefully my next post will be from my brand new scrapbooking room!!!
Subscribe to:
Posts (Atom)