Sometimes when I am creating a card or scrapbook layout, I want a big embellishment but can't find what I need in my stash of supplies and do not want to spend a long time making something! These flowers are quick and easy and look great!

Step 1: Start by gathering your supplies. You will need either a paper bag or crepe paper for the base and then you can use other flowers, brads and any other item you like for the center of the flower. You will also need a 1.5 inch circle piece of cardstock in a coordinating color.

Step 2: Measure a piece of crepe paper that is 12 inches long.

Step 3: Fold the crepe in half so you have one long skinny piece.

Step 4: On the folded side, start cutting from the bottom up. Be sure you don't cut it all the way. You want to leave about 1/4 inch uncut.

Step 5: I used a circle punch to cut a circle from a piece of cardstock for my base. If you don't have a circle punch, you can just cut out a circle. It doesn't need to be perfect because no one will see it. Cover the circle with glue. Any glue will work since crepe paper sticks pretty easily to any surface.

Step 6: Take your fringed piece of crepe paper and start to glue it down to the circle starting with the outside edges and working your way in.

Step 7: This is what it should look like once you have glued down all the crepe paper in a spiral manner.

Step 8: Add a flower and a brad to the center to complete!

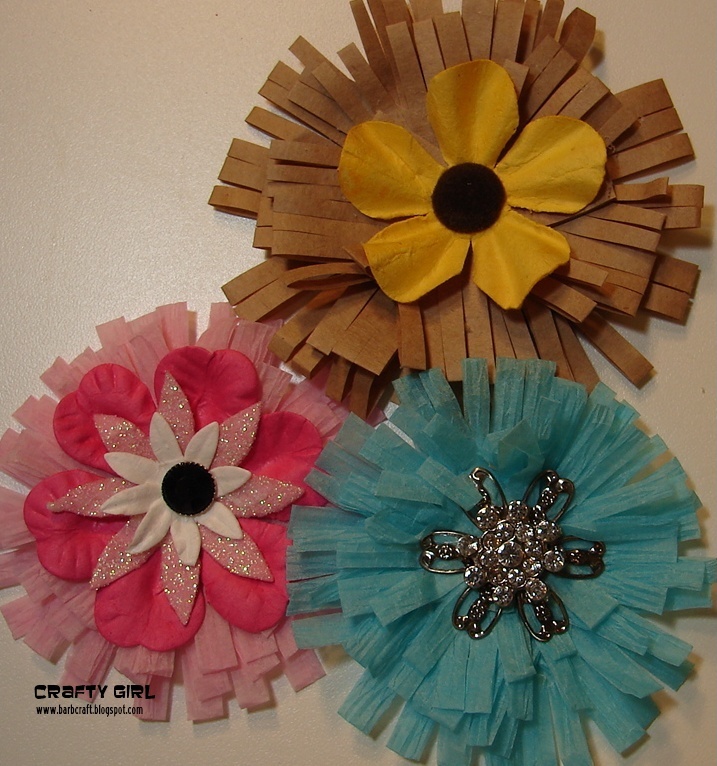
Here are a few flowers that are complete. Notice how much dimension they give without making your page heavy and bulky.

Here is a flower made from a brown paper bag that I used in a layout. I was trying to keep this layout from being too girly since it is about my husband and daughter.

Here is a close-up of the flower on the layout.

I used the sketch from this months Stack-A-Holic Template challenge at DCWV!
The papers are all DCWV Garden Party stack!
I hope you enjoy making these flowers as much as I do!
You can find more tutorials and a lot of inspiration at Frosted Designs! And did I mention that we are having a Design Team call?! Be sure to check out all the details HERE!


10 comments:
Barb these are wonderful and the possibilities are endless with layering.
So glad I popped in to check it out.
Ok..these are amazing! I'm going to try and make some of these. Thanks for the tutorial. Really great job of showing us exactly how to make them.
Beautiful work her.Thanks for the tutorial:):)
Love the flowers Barb! I like that you used tissue paper. It still gives you dimension, but not too much. Gorgeous layout!
These are so fun! They look amazing on your lay-out!
Carri~abusybee
www.doubleclickconnections.blogspot.com
Wow these are gorgeous barb. I will have to try one!!!! I'm not so good with flowers!!!!!! You did a superb job on these and i love them!!!!! Way to go!!!!
Fabulous flowers. Love these. :)
Barb, these are AWESOME!!!! Now I know what to do with that tissue paper I just couldn't throw out!! And the paper bag flower is perfect for a more manly look!! Great tutorial, Barb!! TFS Hugs!!
such cute crepe paper flowers! So happy to be on the QQ DT with you :)
Oooh, those are FABULOUS fringe flowers. Thanks for sharing a great pictorial. I want to try and make some now!
Georgiana
Carson's Creations
Post a Comment